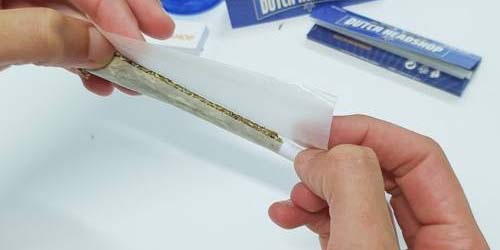
Can't manage to roll a joint? Or is it not quite going the way you would like it to? Let Dutch-Headshop help you. Step-by-step guide to rolling a joint for beginners with handy tips and pictures included (also rolling inside out). The instructions are very comprehensive. Read and watch carefully, and you will succeed!
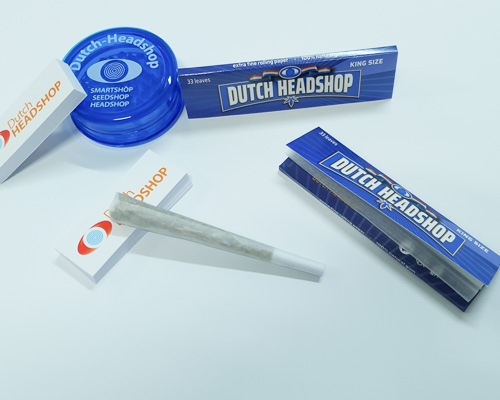
We are going to tell you how to roll a joint using instructions and matching pictures. This is what you need:
- Filter tip
- Rolling paper
- Weed or hash
- Optionally tobacco or tobacco substitute
In the pictures in this blog, you won't see weed, hash or tobacco. We have used herbs that have more or less the same structure.
Rolling a joint step by step
- Before you can start rolling a joint, you must prepare the weed for use. Remove twigs and crumble it into small pieces with your hands or use a grinder. Do not make it too fine. If it starts to look like dust, you have made it too fine. Making a hash joint? Make the pieces as small as possible.
- Mix your weed with tobacco or a tobacco substitute if necessary. One-half to one whole cigarette will do. That is the same amount as half a gram of shag or pot tobacco.
- Make sure you are rolling on a table or rolling tray that has enough room on it. Take a rolling paper out of the package and place it in front of you. Make sure the sticky edge is at the top of the paper and pointing upwards.
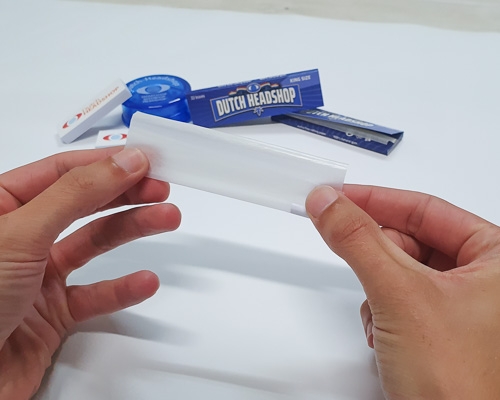
See the shiny sticky edge? This is how you should lay down the rolling papers.
- Roll with a tip to avoid getting smokables in your mouth while smoking. You can roll different types of tips. The easiest way is the "M-Tip." Fold 5 times a small piece of about 2 millimeters until you have an "M" shape and then roll the remaining paper around it.
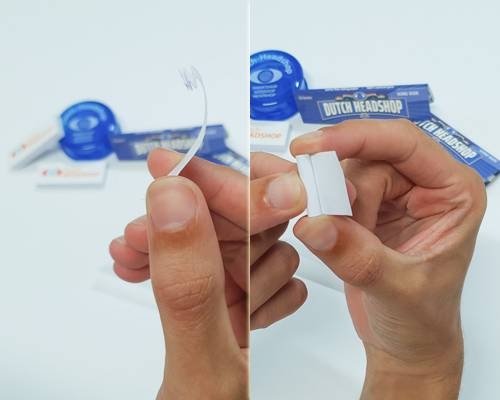
- Now grab the tip with two hands and keep rolling in the direction you rolled it. If you keep this up for 10-20 seconds, the tip will stay in place.
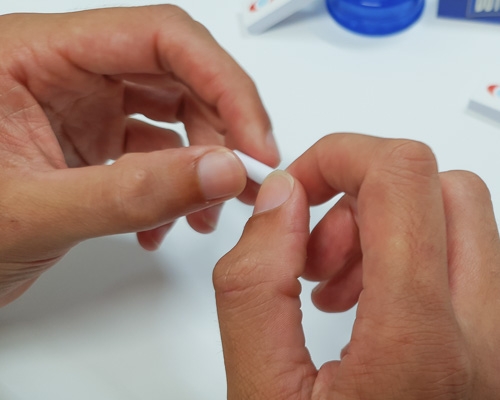
Grab the tip in this manner and continue to roll in the same direction as when you rolled the paper around the M.
- Place your tip on the left or right side of your joint. This is different for everyone. Choose what feels right for you. Most right-handed people place the tip on the right.
- Roll a weed joint? Then you can put all the weed, mixed with tobacco or not for a pure joint, on the rolling paper. Want to roll a hash joint? First make a bed of tobacco, divide all the hash chunks over the joint and cover the hash with a bed of tobacco again. Important: divide the content well. Put a little content at the tip and a lot at the end. If you get it wrong in the beginning you will not succeed.
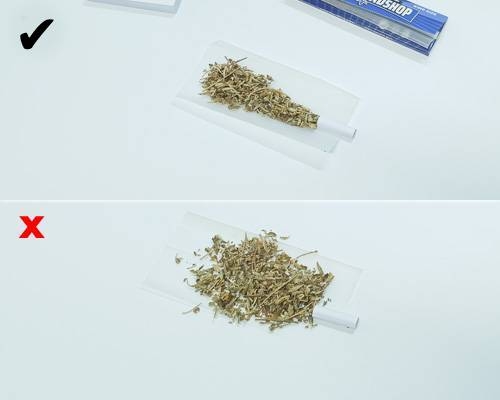
- All preparations done? Then the joint rolling can really begin. Make sure there is something under your joint in case it goes wrong or you spill something. A Rolling Tray or just your table.
- Grab the rolling paper, tip and content gently with your hands. Essentially, you only use your thumb, index finger and middle finger actively when rolling. The other two fingers are used support. Try to hold the joint loosely. Little tension on your fingers, as seen in the picture below.
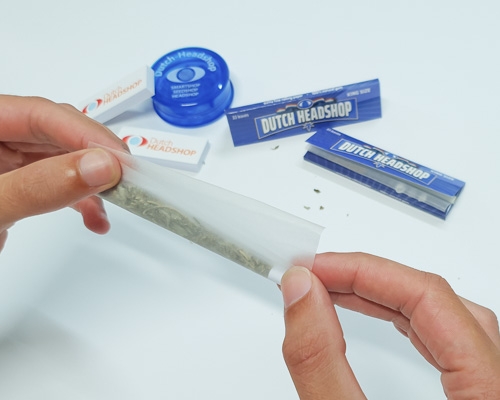
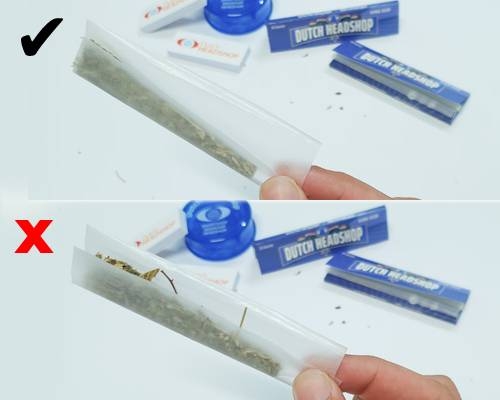
- You roll the joint by gently rolling it back and forth between your fingers. The front and back part of the joint rub against each other. Always keep one hand near the tip. Start with the other hand close to the tip and roll upwards. This way the content gets the right shape. Make sure there is no weed, hash or tobacco between the two parts of the rolling paper, but everything in the cone-shaped area below. Notice that the contents are not well distributed? Put the joint down for a moment and spread it out evenly.
- When the joint has a nice shape, the most important part of joint rolling begins: rolling it inwards. To do this, you grab the joint at both ends. One hand at the tip and one at the top. Now you gently roll the joint back and forth and try to get the front part of the joint a little lower. Do this until you see a small edge of weed, hash and/or tobacco. Like in the picture below.
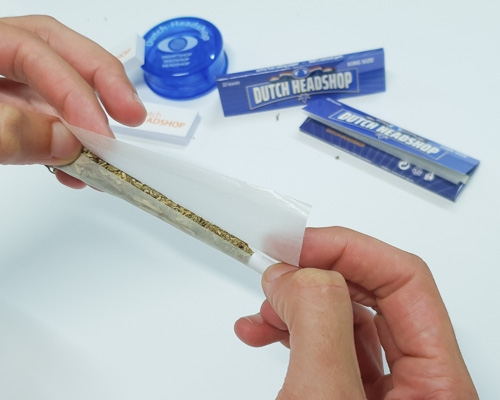
Try to hold the joint this way as relaxed as possible. If you practice this, the rolling will become easier and easier.
- Once you have the edge, try using your index fingers to fold the back part of the rolling paper over the edge. Start on the side of the tip and work your way up. Tip: When rolling inwards, it is sometimes helpful to grab the paper with your mouth. This way you can pull it tighter over the joint.
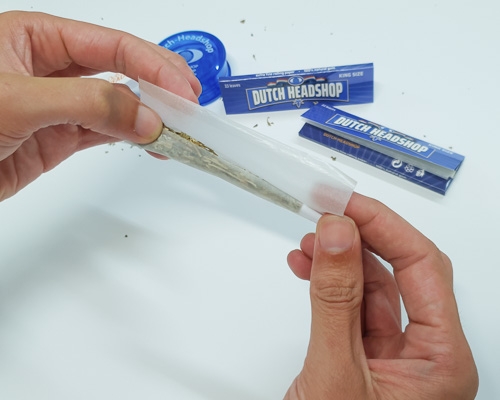
Notice the right index finger. With that, you put the rolling over the edge.
- Next, try to roll up the rest of the rolling paper as tightly as possible, until you see the sticky edge appear.
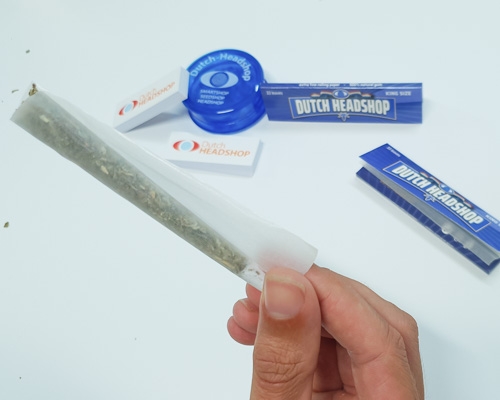
- Once your joint looks as shown in the picture above, you can start licking the sticky edge. Start at the top and lick about half of the joint. Then roll the rolling paper up until it sticks together. Then lick the bottom half of the sticky edge and roll the joint all the way up. Important: make sure the joint stays in place at the tip at all times.
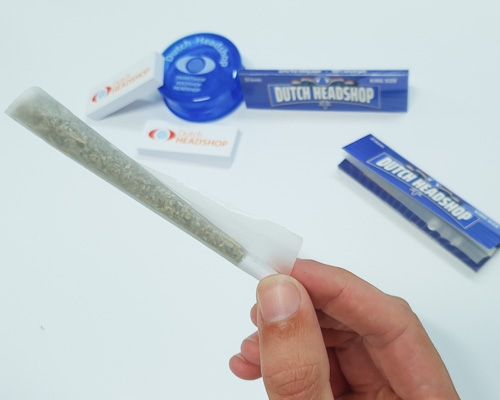
First lick and stick the top half. Then the bottom half.
- Gently press the top of the joint and neatly fold or twist the protruding rolling papers. Congratulations on successfully rolling your own joint!
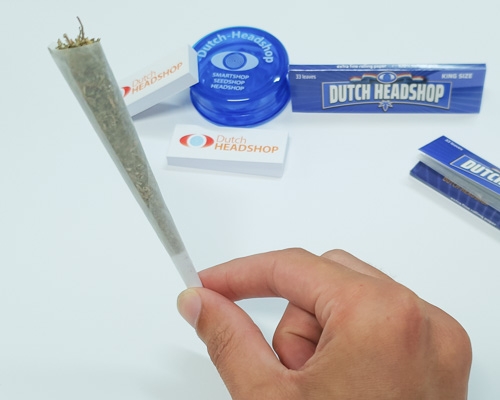
There is a lot protruding at the top. Press the joint with a stick, pen, lighter or cigarette filter.
Inside Out Joint
If you have successfully rolled a normal joint, you can try rolling a joint inside out, insi or inside out. It is better to practice the normal joint so that you can roll it perfectly. After that, inside out is not very difficult.
People roll an insi joint because it means they are smoking less paper. The flavour is said to be better than with a normal joint. You have less problems with burn-in (when one side of the joint burns faster than the other) and once you have mastered it you can roll a joint tighter than a normal joint.
Rolling Inside Out Joint
If you want to roll inside out, you can follow the instructions from this blog up to step 10. But note that there is one very important change. That is, you will be placing the rolling papers differently at the beginning. The adhesive edge is supposed to be on the bottom of the rolling paper and pointing toward the table. You can check this by pressing your finger on the sticky edge. Your finger should not stick, because the edge is on the other side.
Is it positioned correctly? Then you can roll a joint inside out by following these steps after step 10!
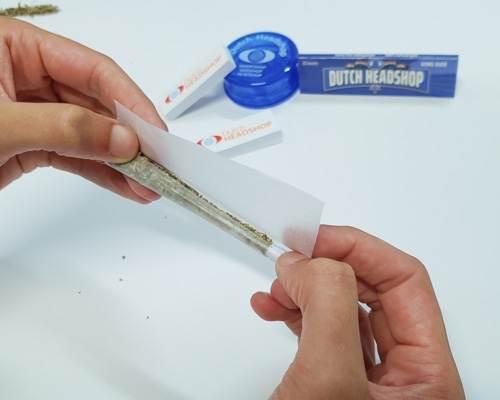
Note the adhesive edge! It is now in a different place.
- Hold your joint like the picture above. With your hands on the ends of the joint. Then use your index fingers to try to place the outside of the rolling paper over the joint. Try to roll the joint as tight as possible. Tip: When rolling a joint it can be useful to hold the rolling paper with your mouth. This way you can roll it tighter over the joint.
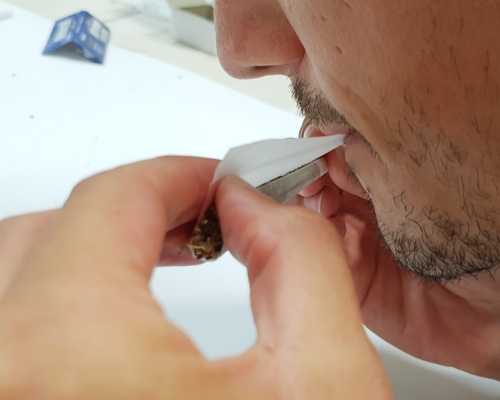
Can't get the joint tight enough around the rolling papers? Use your mouth to tighten the joint while rolling it inwards.
- Continue rolling until you see the sticky edge. Try to keep that sticky edge as straight as possible in front of you and keep it tight by placing your fingers on the sticky edge at both ends. Then lick the sticky edge once or twice and stroke it once with your thumb. Don't forget the bits under your fingers.
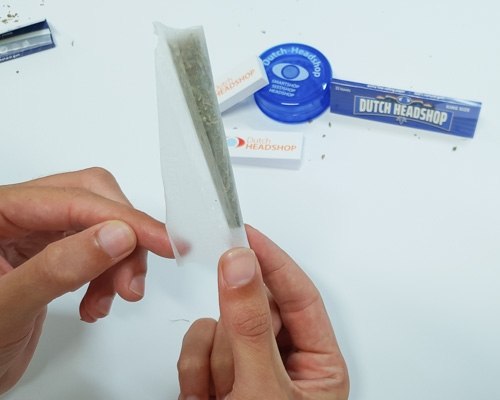
Can you see the adhesive edge under the first layer of paper? Lick it!
- If you've done it right you can now basically let go of the joint. You have almost succeeded in rolling the joint inside out, but you are not there yet! The idea is to fold over the part of the rolling paper that sticks out. You will clearly see a fold line. Also lick this from top to bottom. Make sure that the side of the tip is well licked.
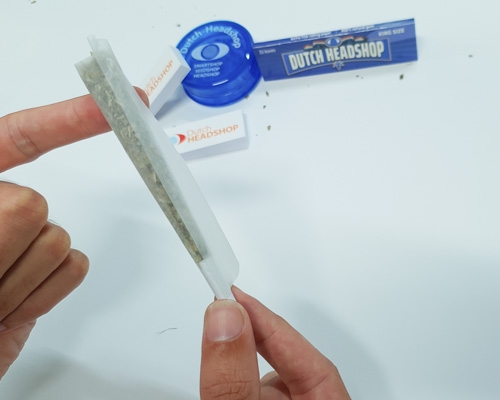
- One of the hardest things about rolling an insi joint is the tearing off. The idea is to start at the bottom of your joint. Make sure the protruding part of the rolling paper is perpendicular to the joint. With two fingers, lightly press into the joint right where the fold is. Then gently pull the protruding part of the rolling paper towards you so that it tears off.
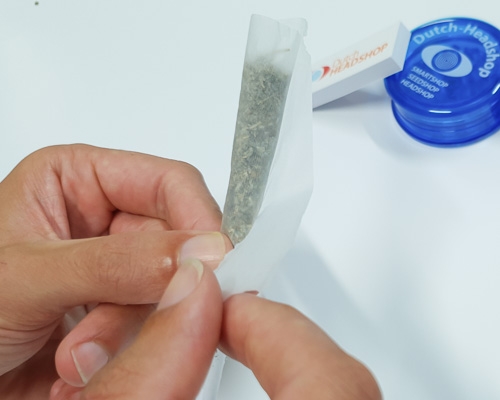
- Important: Do not tear off large pieces at once. Then it will go wrong faster and the whole joint will tear. So always tear a piece of 1 or 2 centimeters. Press with two fingers on the spot where you left off and carefully pull the paper back towards you.
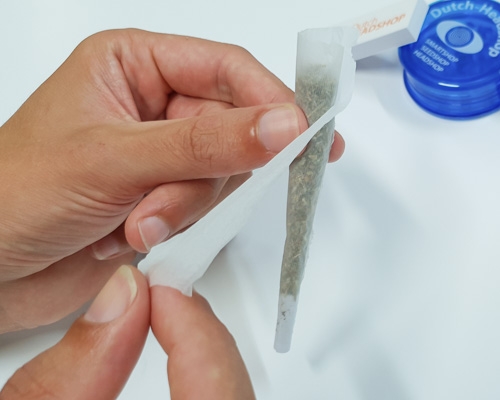
- When all the rolling papers have been torn off, gently press the joint and twist or fold the top. Congratulations! You have rolled your first inside out, insi or inside out joint!
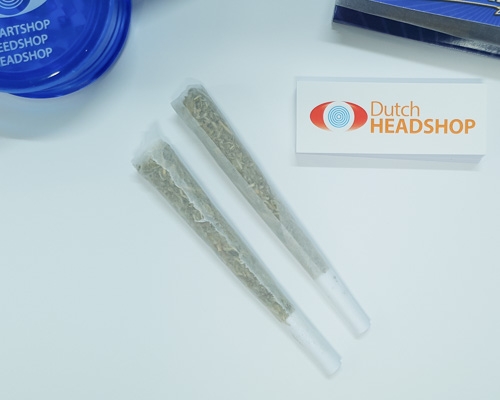
End result! Left is rolled inside out (less rolling paper). Right is rolled normally.
Can things not get crazy enough for you? Then try rolling a special joint. For example, a twister, pipe or tulip joint. Find clear instructions in our blog: “Rolling a special Joint.”