Do you want to get intensely high from your homemade cube of hash? Then keep reading. Because in the last part of this course we take a look into the world of Ice-O-Lator. Heaven for hash lovers. It takes some time and effort to produce it, but what you get in return is absolutely worth it. How to make Ice-O-Lator hash? You can read that further on in this article.

In this 4-part course we’ll teach you how you can make high-quality dabs in a professional manner. You’ll find everything here: the equipment, a step-by-step plan, handy photos and clear instructions. Furthermore, in each part we will point out the advantages and disadvantages of each weed concentrate. All so that you can enjoy them in a responsible manner.
- Part 1: Making Rosin
- Part 2: Making BHO Hash Oil (Shatter/Crumble)
- Part 3: Making THC Wax
- Part 4: Making Ice-O-Lator
Are you looking for items with which you can make dabs? Rosin press, oil extractor or something else? Check out what’s on offer in Make Concentrates and Weed Dabs. You’ll find everything you need here!
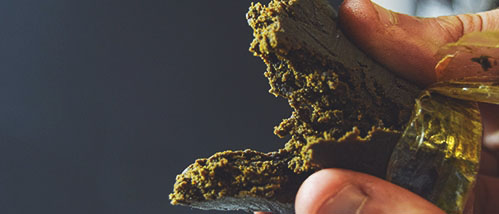
What is Ice-O-Lator Hash?
Ice-O-Lator is also known as bubble hash, ice hash or isolator hash. It is a very strong form of hashish. It can contain up to 80% THC and is therefore considered to be a weed concentrate. It owes its strength to the unique production process. Cannabinoids and other substances are extracted from cannabis using ice water and special ice-o-lator bags. The trick here is to work with temperatures just above the freezing point. You can do this process 'by hand', but there are also special machines for making ice hash.
You can make ice-o-lator from cutting waste. But please note: the better the quality of the plant material, the purer and stronger your final block of bubble hash will be. Did you use your potent weed tops and follow the instructions of the production process correctly? Then ice-o-lator is the strongest form of hash and one of the purest forms of dabs / weed concentrate.
You can find all the materials you need to make ice-o-lator on the page Making Hash.

Ice-O-Lator Hash
Advantages and Disadvantages of Bubble Hash / Ice Hash.
Every weed concentrate has its advantages and disadvantages. In all four parts of this course we give the pros and cons for each type of dabs. This way you can compare them and see what the best type of dabs are for you. Advantages and disadvantages of ice-o-lator:
+ Strong and An Authentic Taste
As we've mentioned before, isolator hash is one of the strongest types of dabs. Do you want strength and potency? Then it's a good choice. But not only the purity and the high THC and/or CBD content play a role. Also the authentic hash taste is a big advantage of these dabs. Are you a hash lover? Then your choice is easily made.
+ Different ways of Smoking
Ice-o-lator is a unique form of dabs. This is because it is not common to dab it in the traditional way. Do you throw ice hash in a banger or on a nail? Then you have to keep in mind that you have to clean it well afterwards. Ice-o-lator leaves a residue. Something that is not the case with rosin, shatter, BHO or wax, for example. It may not sound positive, but this allows you to smoke the hash in more ways. Putting liquid BHO in your joint becomes tricky, but you can smoke ice-o-lator in a joint just like any other type of hash. So if you don't like all that fuss and prefer to stick with an old-fashioned joint? Ice-O-Lator is your dab!
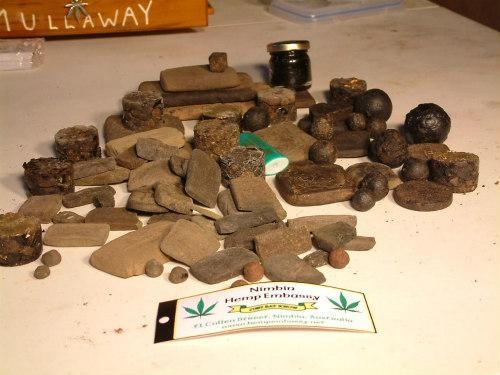
Different types of hash
- Expensive and Complicated
Planning on making ice-o-lator? Then you have to be aware that the cost of purchasing all the materials can be quite high. A special device for making ice hash can easily cost more than a hundred euros. And the ice-o-lator bags (with which you can do it yourself) are not exactly cheap either. But once you have this in the house, it will last you for a while.
One more thing to take into account is that the production process is quite complicated. You have to do lots of steps and take many things into account. Do you want to do it right? Then you have to work intensively for a couple of hours. You can see it as work, but secretly it's also a lot of fun to do. Think of it as Breaking Bad in your own kitchen. Cool, right?
Materials for making Isolator Hash
You can make Ice-O-Lator in different ways. The classic way: with Ice-O-Lator bags. Or the new way: with the Bubbleator. Below are the materials you need for both production methods.
Classic way:
- Ice-O-Lator bags
- Weed and/or cutting waste
- Large trays / buckets (about the size of the biggest ice-o-lator bag)
- Water
- Large amount of ice (depending on the size of the filter bags and the amount of weed) - around 2 to 5 kilos.
- Kitchen Strainer
- Rod mixer and/or something to stir with
- Thermometer
- Hash Press (optional)
There are several types of ice-o-lator bags available: the travel-size, small, medium and large. Each filter bag is suitable for a certain amount of weed. See the product pages for more information.
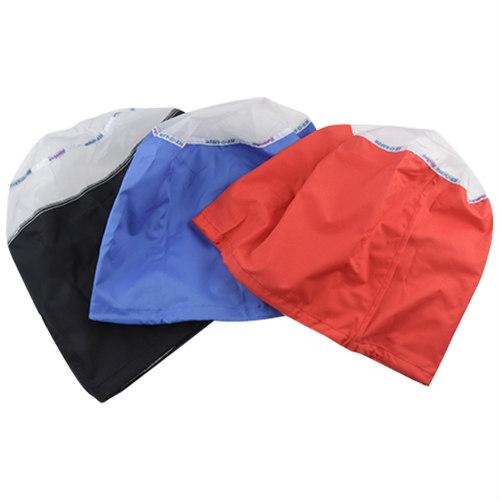
Ice-O-Lator Bags Set
Bubbleator:
- Bubbleator B-Quick (includes Ice-O-Lator Bags)
- Lots of ice
- Weed and/or Cutting Waste
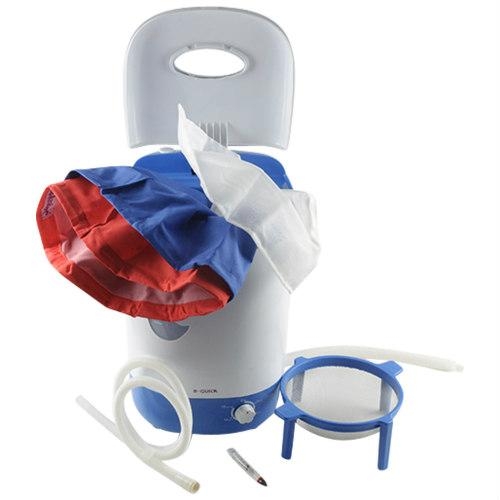
Bubbleator B-Quick
Making Ice-O-Lator – The classic way
When you've got all the materials together, you can start making ice-o-lator. Read the instructions carefully before you start. This way you won't be faced with any surprises. It may also help to watch the Bubbleator video at the bottom of the page. This will give you a good understanding of what is actually meant and nothing will stand in your way anymore. Good luck!
- First see how much weed or cutting waste you are going to use. This depends on the maximum capacity of your ice-o-lator bags. You can assume that you can make about 5 - 7.5 grams of ice-o-lator from 50 grams of weed or waste cuttings. This depends on the quality of your weed or cuttings.
- Make sure there are not too many branches between the plant material and put it in the freezer. You will later submerge the weed in ice water. When you do this, the weed must be completely frozen.
- Grab a large bucket and fill it with ice and water. Make sure the weed is completely submerged and now stir through the bucket for about fifteen minutes.
- Prepare the next tray. This will take a little more effort. First you fill the bucket with water that is as cold as possible. Make sure that you still have around 10 to 15 cm of space under the edge. Now take the strainer bags and put them in the bucket. First take the finest one (25µm) and then the roughest one (220µm) if you are looking at the mesh size. Make sure the bags are as tight as possible around the edge of the bucket. You can use the cords on most of the ice-o-lator bags.
- Now grab some extra ice and put a layer of ice in the bucket with filter bags. Then throw a layer of your mix (weed with ice water) on top and repeat this until the mix is finished. Leave the bucket for another 15 minutes to make sure all cannabinoids have been extracted. The ideal temperature is between 2 and 5 degrees Celsius. Are you really precise? Then keep an eye on it with a thermometer.
- Now it's time to start straining. Some people use a rod mixer for this. If you want to do the same, make sure you can cover the top of the bucket. Then put the rod mixer through the lid and mix for about 5 minutes. Check if there is plant material stuck to the side of the bucket. Wipe this to the center and repeat the mixing. Finally leave the mix for 5 minutes to make sure that all THC and CBD (crystals) have sunk down. You can also do this process without a rod mixer. Mix until all the crystals are at the bottom of the mix. Please note that this step can take up to 45 minutes. Be patient and make sure everything has sunk to the bottom properly.
- Now you're going to take the bags out of the bucket one by one and squeeze them out. After you take out a bag, repeat step 6 if necessary.
- You start with the most rough mesh (upper) bag. Take it out of the bucket and drain it. Squeeze the bags tightly so that all the moisture is drained out of the bags. Also check the bottom of the bag on the outside. This is where valuable and potent material can get stuck. Collect all the crystals and move on to the next one. Repeat this process with all the bags from the bucket. Especially with the last one you have to be careful. Emptying the bags takes a long time and you have to be careful so nothing will be wasted. Now that all the fluid has drained out of the last bag, collect the contents of the bags. See if there is any green plant matter left and if needed, rinse it away with cold water. Then fold the filter bag in half and wrap it in a tea towel or kitchen paper to take out the last liquid. Don't wait too long to do this. Otherwise it may become mouldy.
- Now you can do two things. You can take a kitchen strainer and empty the contents of the bags in it. Push the crystals through the sieve and you'll end up with a crumbly hash.
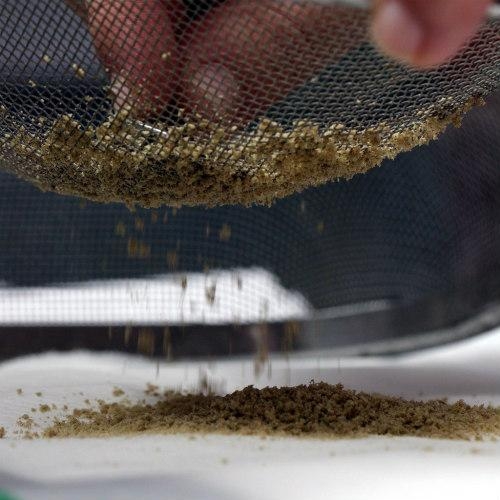
Crumbly Ice-O-Lator / Bubble Hash
You can also put the contents of the bags in a hash press or spin a ball of it yourself with your hands. If it's sticky enough, put it in the freezer to take out the last liquid. This way the hash will usually get darker.
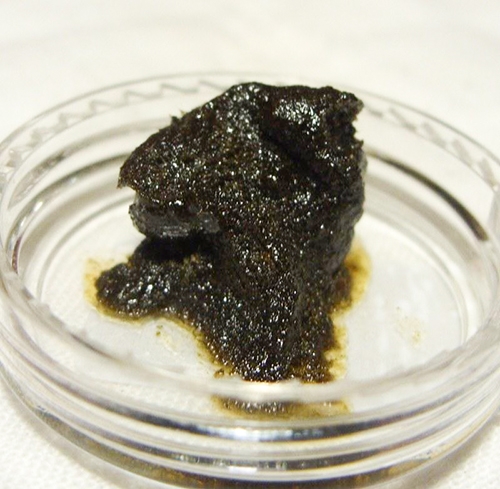
Dark Ice-O-Lator / Bubble Hash
Now you're done making ice-o-lator and you can start enjoying it. Start with a little bit of hash to see how this goes. It can be very strong.
Making Ice-O-Lator with the Bubbleator
As you've been able to read, making ice-o-lator by hand is a pretty challenging job. You have to do a lot of operations and you're going to be busy for a while. Do you not feel like doing all of this? Then think about getting a Bubbleator B-Quick from Pollinator. This will speed up the process and you'll have to do a lot less yourself. You are also assured that everything goes well and you can smoke the purest isolator hash. Below is a video that shows you how to make ice-o-lator with the Bubbleator, step-by-step.
CBD Hash: Medicinal Ice-O-Lator
In this course we focus mainly on THC, but it just depends on what plant material you use. If you want to make an extremely potent CBD hash, of course you can! Make sure you use a CBD-rich weed strain to start with. Then you can make CBD hash with as much as 80% CBD. The nice thing is: this can be done with exactly the same methods. Take for example a nice 1-on-1 strain for 40% CBD and 40% THC! The recipe for an extremely potent and medicinal CBD hash.
Smoking Ice-O-Lator
As discussed earlier, insulator hash can be smoked or dabbed in different ways. You can even put it in a vaporizer (as long as you take the risks into account). Here are some suggestions for using your homemade cube of ice-o-lator!
- Put it in your joint. Ice-o-lator is the only kind of dabs you can easily put in your joint. Other types of dabs can often be lubricated on the outside of a twisted joint. But an old-fashioned Dutch joint filled with 80% THC hash? That is incomparable and only possible with bubble hash.
- Vaping Ice-O-Lator hash. With some exclusive vaporizers, such as the Volcano Hybrid, you can easily vape hash without any effort or with the supplied accessories. With most other vaporizers you need to take some precautions. But if you have the right materials, you can vaporize your potent super hash in a whole range of vaporizers. Want to know more? Read our blog: “Vaping Hash for Beginners”.
- Dabbing in a dab bong or dab rig. This is of course THE way to smoke dabs. So is ice-o-lator. Buy a dab bong or dab rig with a banger or nail. Fill it with hash and get really stoned. Please note that ice-o-lator can leave stubborn residue. Clean the bong immediately after use!
Looking for items for dabbing & dab smoking? You can find everything here. The most beautiful dab bongs, vape pens, dabbers, carb caps and much more!